Creating Groups
In order to create Fuzzball groups, your user will need organization owner permissions. Groups can be created using either the web UI or the CLI. Follow the instructions corresponding to your preferred method below.
Group names must be unique within your organization and should be descriptive to help team members understand the group's purpose.
Please select either the web UI or CLI tab to see the appropriate instructions for your environment.
Prerequisites
Before creating groups via the web UI, ensure you have:
- Organization owner permissions
Creating a Group
-
Log into your Fuzzball UI as an organization owner
-
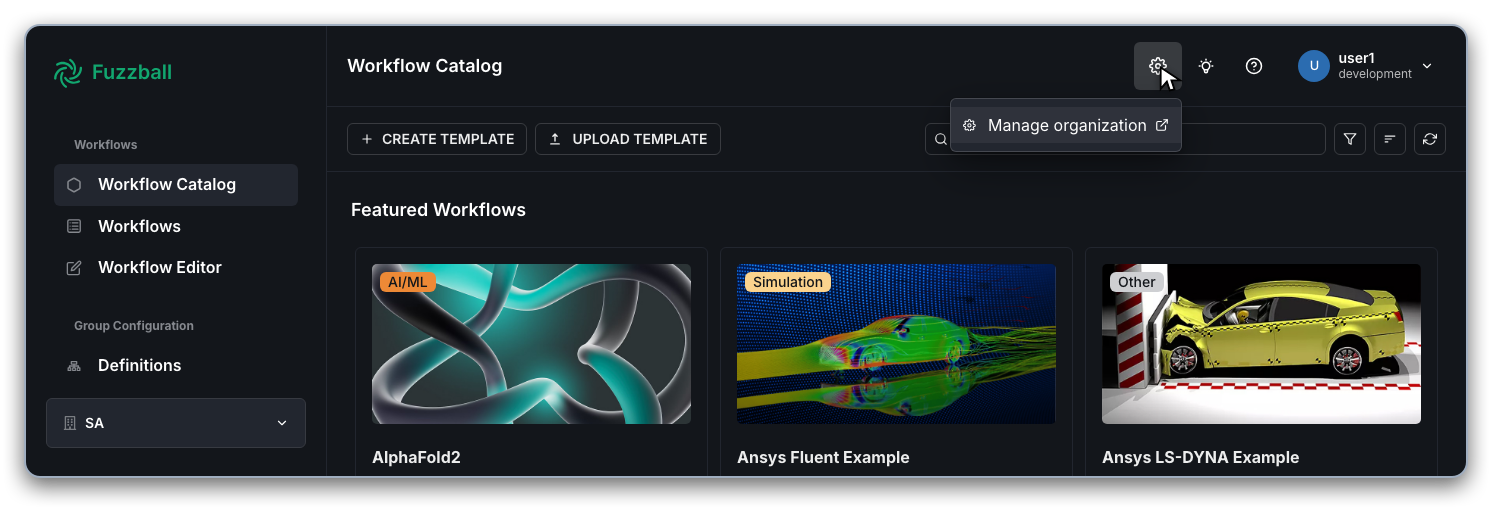
Click on the Gear icon in the top right of the dashboard header and select Manage organization
-
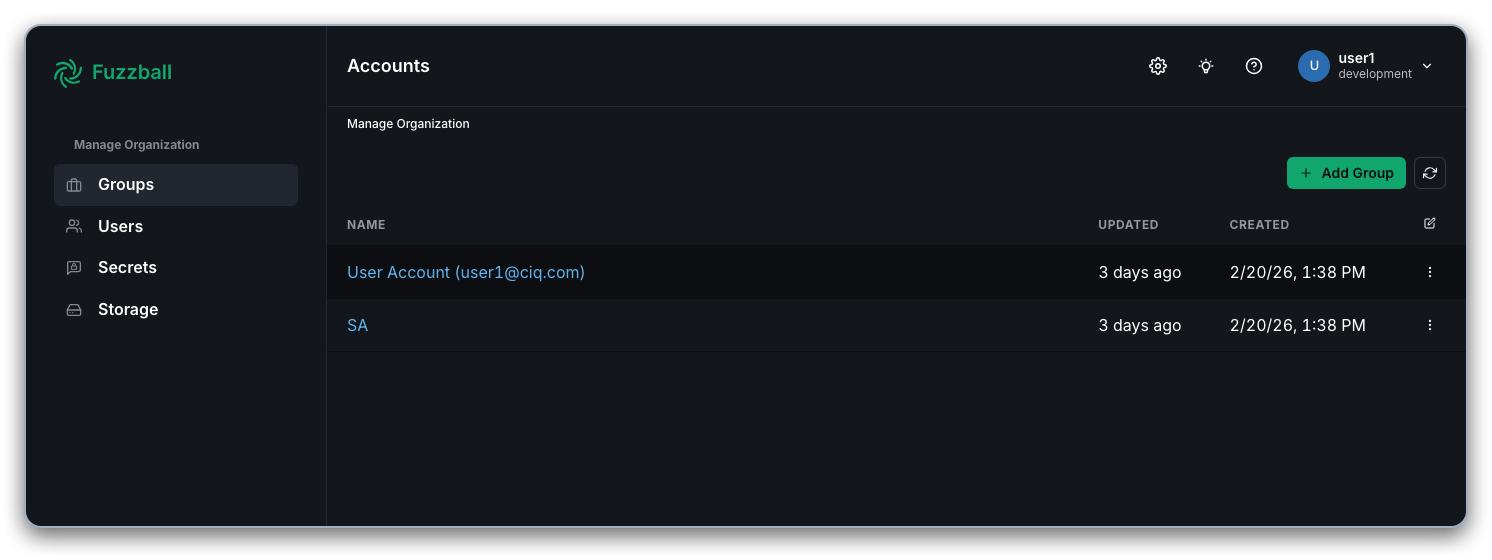
Navigate to the Groups section in the left toolbar
-
Click the Add Group button
-
In the group creation dialog:
- Enter a name for the new group (e.g., "SA")
- Click + Add
-
The new group will appear in your groups list and you will be set as the group owner
After creating the group, you can begin adding users and configuring group-specific resources.
Prerequisites
- Organization owner permissions
- Fuzzball CLI with a context configured for the admin user
Creating a Group
To create a new group, use the Fuzzball group CLI subcommand create with
the desired group name as an argument. In this example, we'll create a
group named SA:
$ fuzzball group create SA
Group: SA created with id: 324fe14b-1008-4c2d-8e07-e7136c7db38f
When a group is successfully created, a UUID is returned as shown above. This ID uniquely identifies the group and can be used in other CLI operations.
Verifying Group Creation
To confirm the group was created successfully, you can list all groups:
$ fuzzball group list
SELECTED | ID                                   | NAME
         | 06559942-1f88-4c99-93c5-2dfb1537d355 | admin@ciq.com
    *    | 2ec072f6-7ab2-42fc-acce-5fc0912ce3b0 | default
         | 324fe14b-1008-4c2d-8e07-e7136c7db38f | SA
The new SA group appears in the list, confirming it was created successfully. You are
automatically set as the group owner when creating a group via the CLI.
Next Steps
After creating your group, you may want to:
- Add users to the group to give them access to group resources
- Set up storage volumes, secrets, and other resources for the group